Is it too early to bust out the Sally Field, "You like me, you really like me!" acceptance speech? Yes? Okay. I do want to thank Jen @ The Thrifty Home for featuring me on her 24th Penny Pinching Party -- my very first shout-out!
And now I want to en-"lighten" you about a nifty, thrify home project I did this past summer -- matching lamps on the cheap for my master bedroom. (Yes, I just said en-"lighten." The cheesy force is strong with this one.)
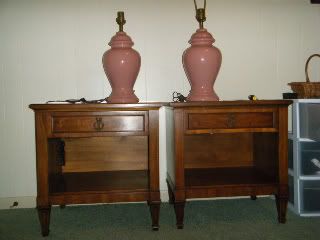
Let's start with our lamps, shall we? These were the dusty rose items in question:
Horrifically 80's, right? But look at the shape -- classic ginger jar, and very versatile. And the price was right: $5 each from Goodwill. Have you SEEN the price of new lamps lately?! It's criminal! For ten bucks, I will take this redo risk!
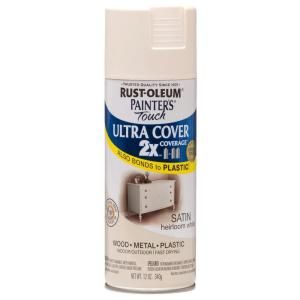
Now, I love pink, but Antique Pepto was not in my shabby-beach chic design scheme, so some bonafide spray paint action took place with the help of blogland's favorite, Rustoleum Heirloom White spray paint in satin finish.
Despite being named Heirloom White, this is actually a rich creamy color
with no yucky yellow undertone.
with no yucky yellow undertone.
Now, I don't have an action shot of me spraying the lamps, but the process is easy peasy. Your prep work is everything, people! First, take your cord and bundle it together with a twist tie. Then, bag it off inside a plastic Wal-Mart or grocery bag, and tape any remaining exposed cord with painter's tape.
Take a sandwich baggie and cover the socket where your light bulb will go, and tape off any exposed metal in this area that you don't want to get paint on. If your lamp has a switch at the bottom or side, like these lamps have, tape it off also.
Take a sandwich baggie and cover the socket where your light bulb will go, and tape off any exposed metal in this area that you don't want to get paint on. If your lamp has a switch at the bottom or side, like these lamps have, tape it off also.
At this point, you will have a lovely little bundle that you can spray paint. Use a light hand, but don't go into spasms if drips occur -- some lamps have a very slick surface and it's hard not to have a drip.
For my lamps, I used a very fine sanding block (the finest you can get) to gently rub over my drips once dry, and then I used a lighter hand for the final coat. If you do get paint on your cord or other parts, a little nail polish remover will take it right off.
For my lamps, I used a very fine sanding block (the finest you can get) to gently rub over my drips once dry, and then I used a lighter hand for the final coat. If you do get paint on your cord or other parts, a little nail polish remover will take it right off.
Now let's look at what we have here:
Thank you for rescuing me!
Major improvement here! I added a $15 Better Homes & Gardens drum shade from Wal-Mart, and the difference is amazing. I chose this shade for the shape, color, and texture (you can't tell in the pic, but the fabric is slightly textured like linen). But where, you ask, is the shabby-beach chic aspect? Well, folks, here it is:
Starfish! Seashells! Antique keys! Are you in love yet???
A precious ocean-themed tassel that I scrapped together in about ten minutes! You likey? Here's the cliffhanger: tutorial to come! Visit me soon for the full details :-)
I'm linked up to:
"I made it ... without my hubby!" @ Shanty 2 Chic
Trash to Treasure Tuesdays @ Reinvented.


Love how it turned out with the shells and the keys! Hard to believe that was once a mauve lamp!
ReplyDeleteThat is awesome! Congratulations on being featured!
ReplyDeleteI'm a newbie to blogs, but you just made my Inspirations list at hello.
ReplyDeleteGreat makeover. I love the new color and the addition of the shells!
ReplyDelete