Twitter Facebook RSS Bloglovin Pinterest Instagram Image Map

Monday, June 24, 2013

Spray Painted Canisters

Hey everybody!
I'm still plugging along with my low-to-no cost kitchen decorating, 
and I have a really cool project to show you!

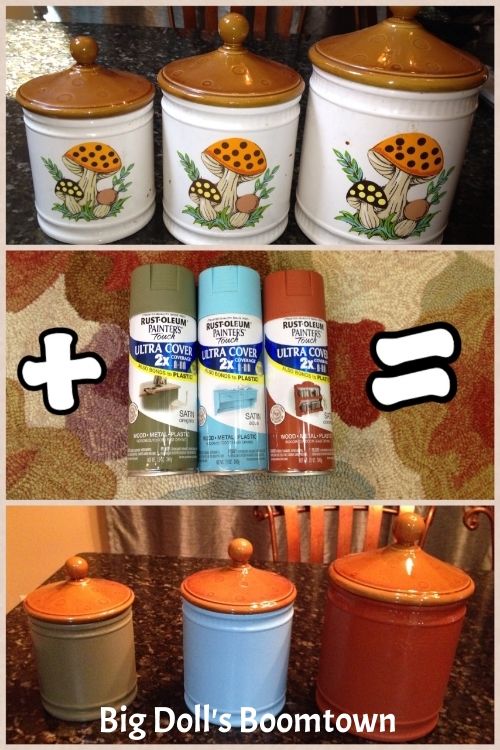
Spray painted kitchen canisters to perfectly match my rugs!

 photo canisterscollage.jpg
I got two kitchen mats like this at Garden Ridge back in April, 
because I loved the color combo and the design.

 photo inspirationrug.jpg
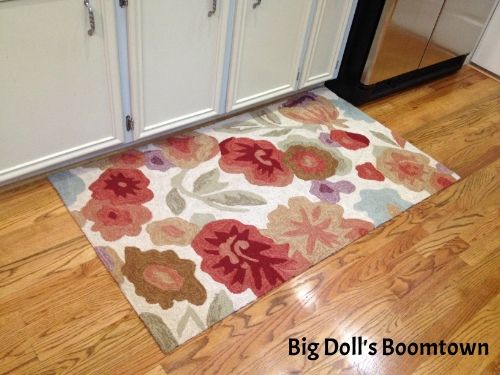
They were each about $50, so $100 total, 
but I bought them with money I earned selling stuff I didn't need on Facebook,
 so they were actually no out-of-pocket cost to me. 
That's the way (uh huh, uh huh) I LIKE it :-)

I knew I could bring warmth to the kitchen if I just pulled the colors from the rugs,
so my first step was to choose 3 colors from the rug and buy spray paint to match.

 photo rugspraypaint.jpg

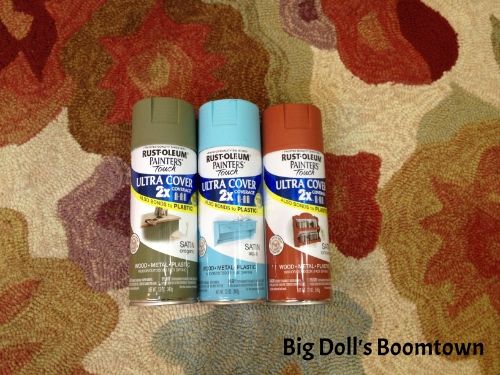
I picked 2 colors I didn't have much of in my house (orange and aqua), plus a neutral (sage). 
Red and purple are two of my favorite colors, so there's plenty of
 stuff I already own that I can decorate with (which, ahem, shall be a post to itself).

Next step was to go to Goodwill! Also known as my mother ship ... 
I totally lucked out and found this set of kitchen canisters for only $4.50 total -- eep!!

 photo canistersbefore.jpg

 photo canistersprice.jpg
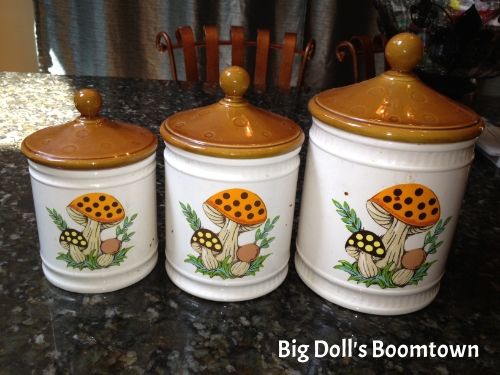
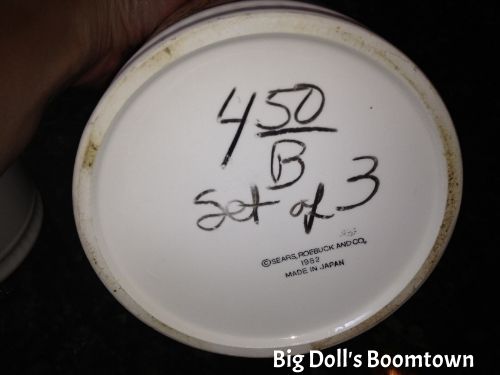
They are over 30 years old, and the pattern is "Merry Mushroom." 
Turns out they were sold by Sears Roebuck in the early '80's.
Plenty of sets on eBay if this is your style -- I think the mushrooms are cute, 
but not the look I was going for.
Since these have brown lids, I didn't even have to spray paint 'em.
 Heh - score lazy points for ME. 

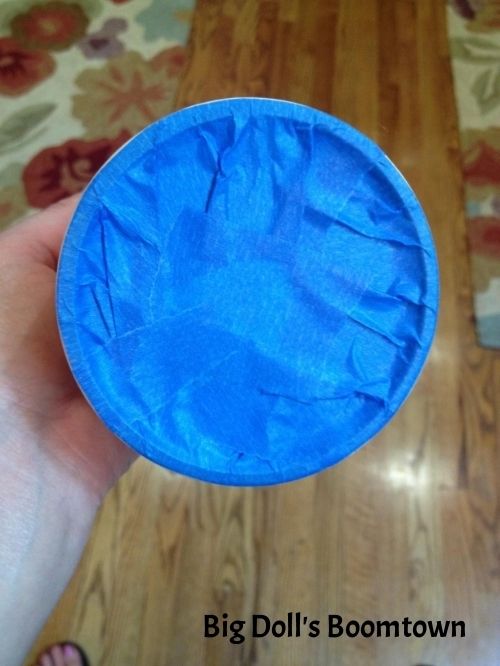
After I scrubbed the canisters with hot, soapy water, and dried them thoroughly,
I kinda went overboard on my paint prep and taping these canisters off.
I didn't want paint inside them (to keep them food safe) or on the bottoms 
(goodness forbid they should stick to a surface).
So I taped the entire bottoms of all 3 off,

  photo tapedbottoms.jpg

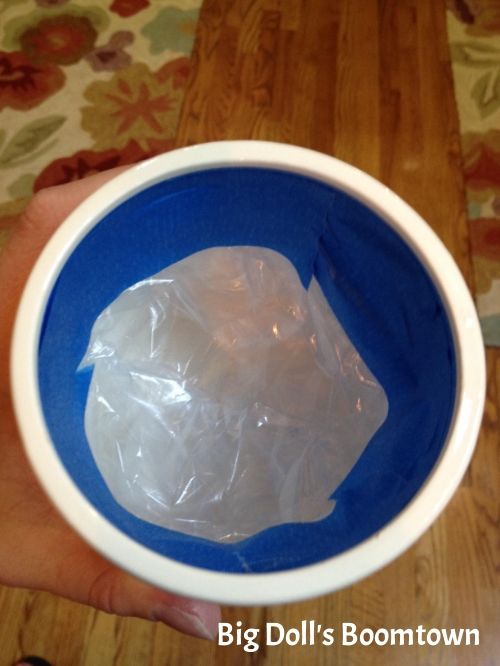
 and then taped the inside edge plus taped a sandwich baggie
inside each to prevent spray paint from getting inside.

 photo tapedinsides.jpg
It took a while, but it was worth it. 

Now, I have done a Lot of spray painting, but I made a horrible, no-good mistake 
because I was SO excited to get started on these canisters.  

... I spray painted on a really humid day.
Like, it had JUST stopped raining. I know, I know.
My paint did not want to dry well, and the edges stayed tacky forever. 
Cannot tell you how many times I had to respray parts that I messed up 
when I thought they were dry and touched them to try to move them.
I seriously felt like I had ruined the whole set. 
Lesson learned: nevah-evah-evah use spray paint when it's damp outside!

But all's well that ends well, and finally I brought them inside for a little glazing. 

Already looking pretty good, huh? 

 photo canisters.jpg

Anyhoo.
I will now share with you the high tech, top secret method in which I glaze things:
mix water and a little brown acrylic craft paint (not too runny),
and sponge on with a paper towel. Let dry.
Yes, that is it.

The effect is very subtle -- the brown glaze just mutes the colors a bit
so they blend better with the tones in the rug. 

 photo b602cd93-63ef-4997-9c5b-7347e216e64b.jpg

What do you think? I think I lovvvve 'em!
So cute, so easy, and so inexpensive :-)
A perfect custom match to my inspiration rugs, too!

I would love for you to become my newest follower
so you can watch my kitchen's progress!

Pin It!

This week I'm partying with:

Amaze Me Mondays @ Dwellings - The Heart of Your Home
Mod Mix Monday @ Mod Vintage Life 
Masterpiece Monday @ Boogie Board Cottage 
Mop It Up Monday @ I Should Be Mopping The Floor  
Creative Bloggers' Party @ Homemaker on a Dime  
What'd You Do This Weekend @ Recipes and Ramblings 
Inspire Me Tuesday @ A Stroll Thru Life
The Scoop @ Cedar Hill Ranch 
One Project At A Time @ A Bowl Full Of Lemons
Efforts and Assets Party @ Hickory Trail Blog
Get Your Craft On Tuesdays @ Today's Creative Blog 
Terrific Tuesdays @ Adventures of a DIY Mom 
Tuesday's Treasures @ My Uncommon Slice of Suburbia 
Penny Pinching Party @ The Thrifty Home
Works For Me Wednesdays @ We Are That Family
What I Whipped Up Wednesdays @ Sugar and Dots
Whatever Goes Wednesdays @ Someday Crafts
Fluster's Creative Muster Link Party @ Fluster Buster
Cast Party Wednesday @ Lady Behind The Curtain
We Did It Wednesday @ Sew Much Ado
What's It Wednesdays @ Ivy and Elephants
Show and Share @ Southern Lovely
Wonderful Wednesday Blog Hop @ Ducks 'n a Row 
Catch a Glimpse Party @ A Glimpse Inside
Hookin Up with HoH @ House of Hepworths
Thrifty to Nifty @ A Jennuine Life 
Time Travel Thursday @ The Brambleberry Cottage 
All Things Thursday Link-Up @ All Things With Purpose 
Thursday's Treasures @ Chocolate Chocolate and More!  
Open House Party @ No Minimalist Here 
Thursday's Treasures @ Recipes For My Boys 
Frugalicious Fridays @ Finding Fabulous
Craftionary link party @ Craftionary
Show and Tell Friday @ My Romantic Home
Featured Nest Friday @ French Country Cottage
Create and Share Friday @ Trendy Treehouse
Frugal Friday's @ Shabby Nest
TGIF Linky Party @ Living Better Together
 Pity Party @ 30 Hand Made Days
Share Your Creativity @ It's Overflowing
From the Farm Blog Hop @ Sunny Simple Life
 Party Junk @ Funky Junk Interiors

Monday, June 17, 2013

Kitchen Wall Vinyl

Remember how I told you about my kitchen needing a punch of decoration and interest?
Well, this is the first step I took in banishing the "meh" and trying to make things spicy!

One day, I looked over my sink and the apron of cabinetry over the sink just seemed extra bare. It bothered me, so I started brainstorming things I could hang up there.

 photo kitchen2.jpg

Some ideas I had were:

- wrought iron scrollwork
- skinny wood or metal vintage looking sign
- pennant banner

Any of these options would have been pretty, but I hit a wall with each
when I tried to figure out how I would hang them up there.
I was really reluctant to drive nails into the cabinetry, even though the previous homeowner did,
and I was concerned that a 3-M command hook might stick out farther than I wanted.

Finally, it hit me: a vinyl wall decal! 

 photo ead06aa5-963b-40c9-af4a-30c9aecfa103.jpg
Ta-daaaaaahhh :-)

I spent less than $10 on this "Bon Appetit" decal on eBay, with free shipping, too.
 It helped that I needed a small vinyl decal and that I selected a design already offered,
because these factors kept my price low.

It took me right around 15 minutes to add a little beauty to this area, and
if I ever change my mind and need to remove the decal, I can heat the vinyl
with my hair dryer and peel it up without harming my paint.

If you've never applied one of these before, my advice is to start small and simple.
You'll need a measuring tape to mark both the horizontal and vertical middles
of your wall space and your vinyl's paper backing.
You'll also need a level to be sure your design is not only centered on the wall,
but also not "whomperjawed" (trademark: my mother) and crooked.
To apply the vinyl, you'll need a stiff plastic tool (use an old gift card) to burnish it onto the wall.

Here is a YouTube video, courtesy Lucid Graphics,
that offers a great visual of the same"horizontal hinge" method I used.
The only thing I want to add is to be sure to check your design is level on the wall
before you remove the paper backing and rub it on.


Thanks for checking out my "Bon Appetit" vinyl art,
and keep watching for my newest thrifty kitchen updates!

Pin It! 
 
 This post linked to:
Met Monday @ Between Naps on the Porch
Amaze Me Mondays @
Dwellings - The Heart of Your Home
Make It Pretty Monday @
The Dedicated House
Mod Mix Monday @
Mod Vintage Life 
Sunny Simple Monday @ Sunny Simple Life  
Mop It Up Monday @ I Should Be Mopping The Floor 
 What'd You Do This Weekend @ Recipes and Ramblings
 Inspire Me Tuesday @ A Stroll Thru Life
The Scoop @ Cedar Hill Ranch 
One Project At A Time @ A Bowl Full Of Lemons 
Efforts and Assets Party @ Hickory Trail Blog 
Get Your Craft On Tuesdays @ Today's Creative Blog
Terrific Tuesdays  @ Adventured of a DIY Mom  
TOO cute Tuesdays @ Funky Polka Dot Giraffe
Tuesday's Treasures @ My Uncommon Slice of Suburbia   
Penny Pinching Party @ The Thrifty Home
Anti-Procrastination Tuesday @ New Nostalgia
Works For Me Wednesdays @ We Are That Family
What I Whipped Up Wednesdays @ Sugar and Dots
Whatever Goes Wednesdays @ Someday Crafts 
Fluster's Creative Muster Link Party @ Fluster Buster
 Lil Luna Link Party @ Lil Luna 
Cast Party Wednesday @ Lady Behind The Curtain 
We Did It Wednesday @ Sew Much Ado
What's It Wednesdays @ Ivy and Elephants 
Show and Share @ Southern Lovely  
Wonderful Wednesday Blog Hop @ Ducks 'n a Row
All Things Thursday Link-Up @ All Things With Purpose
Catch a Glimpse Party @ A Glimpse Inside
Thursday's Treasures @ Chocolate Chocolate and More! 
Open House Party @ No Minimalist Here
Thursday's Treasures @ Recipes For My Boys
Loves on a Thursday @ Imprintalish
 

Monday, June 10, 2013

How to Decorate Your Kitchen!


Hey hey! I want to show you a work in progress - my kitchen! 
I love my kitchen, but decorating it is sort of a pain 
because there isn't much wall or counter space. 

This is not a major reno - just a little accessorizing on a budget!
Everything is already nice, neutral, and in good shape ... 
hmm, sounds like a starting point!

The challenge becomes, 
"How do I add color and personality to this space
while keeping it functional and not full of clutter?" 

Taking pictures of the area was my solution.

You know how sometimes a picture of something
reveals things you didn't notice when you were right in front of it?
Like outfits you thought were flattering ... or does that only happen to me ;-)

I took pics of my kitchen and
used a free iPhone app, Aviary, to help me see what I'd missed! 
I used the "draw" function to circle the "empty" or "problem" zones,
and used "text" to add little notes about what I'd like to see there.

Like this!

 photo kitchen1.jpg


 photo kitchen2.jpg
All those dishes are clean ... just keeping it real!

 photo kitchen3.jpg

Cool, huh?
  •  What if decorating is not your talent?
Text or email those pics to a friend or family member who does have "the touch," and see what they suggest!
  • What if you don't have an iPhone? 
Take digital pictures and open them in MS Paint, where you can also use "draw" and "text" options to highlight areas.

Taking and critiquing pictures of your space could also guide your shopping for a project!
I hate having a vague idea of what I am looking for,
and really don't want to waste money on duds that turn out wrong.
Just a quick look at my "cheat sheet" pics, and problem solved :-)

I've actually already made a few changes to my kitchen, inspired by my pics,
using either things I already had (woohoo!) or got for a little of nothing!
You'll have to check out my changes in the next update!

Pin It!

This week, I'm partying with:

Met Monday @ Between Naps on the Porch
Amaze Me Mondays @ Dwellings - The Heart of Your Home
Make It Pretty Monday @ The Dedicated House
Mod Mix Monday @ Mod Vintage Life
Sunny Simple Monday @ Sunny Simple Life 
 Inspire Me Tuesday @ A Stroll Thru Life
The Scoop @ Cedar Hill Ranch 
Terrific Tuesdays @ Adventures of a DIY Mom
Get Your Craft On Tuesdays @ Today's Creative Blog
TOO cute Tuesdays @ Funky Polka Dot Giraffe
Tuesday's Treasures @ My Uncommon Slice of Suburbia
Anti-Procrastination Tuesday @ New Nostalgia
Penny Pinching Party @ The Thrifty Home
Works For Me Wednesdays @ We Are That Family
What I Whipped Up Wednesdays @ Sugar and Dots
Whatever Goes Wednesdays @ Someday Crafts 
Fluster's Creative Muster Link Party @ Fluster Buster
 Lil Luna Link Party @ Lil Luna 
Cast Party Wednesday @ Lady Behind The Curtain 
We Did It Wednesday @ Sew Much Ado
What's It Wednesdays @ Ivy and Elephants 
Show and Share @ Southern Lovely  
Wonderful Wednesday Blog Hop @ Ducks 'n a Row 
Party Time @ The 36th Avenue

Hookin Up with HoH @ House of Hepworths
Thrifty to Nifty @ A Jennuine Life
Time Travel Thursday @ The Brambleberry Cottage
All Things Thursday Link-Up @ All Things With Purpose
Catch a Glimpse Party @ A Glimpse Inside
Thursday's Treasures @ Chocolate Chocolate and More! 
Open House Party @ No Minimalist Here
Thursday's Treasures @ Recipes For My Boys
Loves on a Thursday @ Imprintalish