Hey everybody!
I'm still plugging along with my low-to-no cost kitchen decorating,
and I have a really cool project to show you!
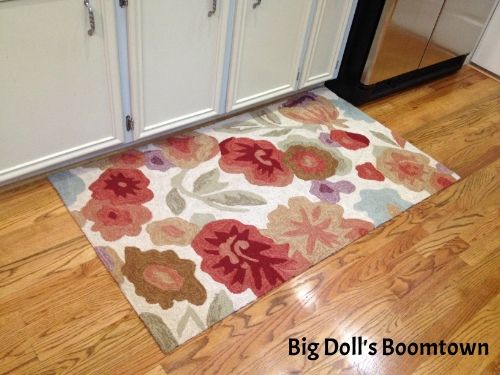
I got two kitchen mats like this at Garden Ridge back in April,
They were each about $50, so $100 total,
but I bought them with money I earned selling stuff I didn't need on Facebook,
so they were actually no out-of-pocket cost to me.
That's the way (uh huh, uh huh) I LIKE it :-)
I knew I could bring warmth to the kitchen if I just pulled the colors from the rugs,
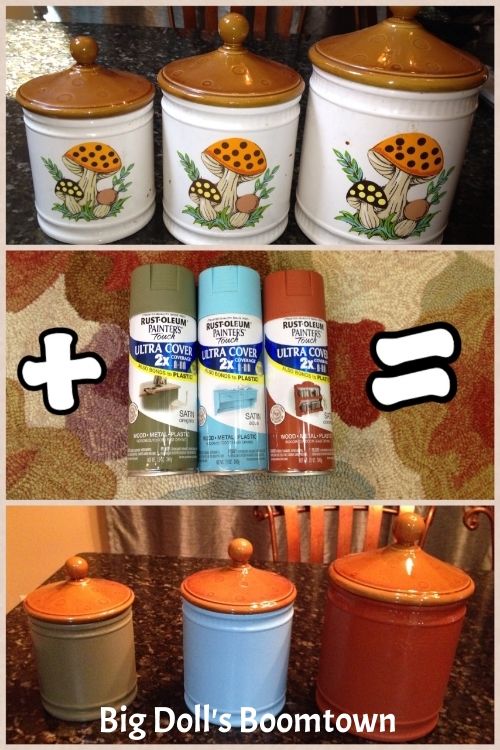
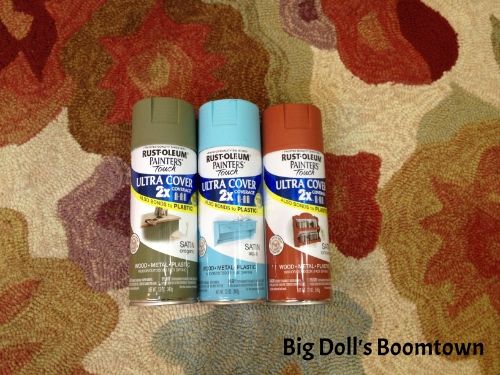
I picked 2 colors I didn't have much of in my house (orange and aqua), plus a neutral (sage).
Red and purple are two of my favorite colors, so there's plenty of
stuff I already own that I can decorate with (which, ahem, shall be a post to itself).
Next step was to go to Goodwill! Also known as my mother ship ...
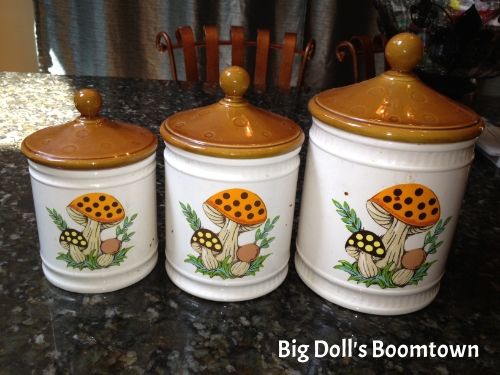
They are over 30 years old, and the pattern is "Merry Mushroom."
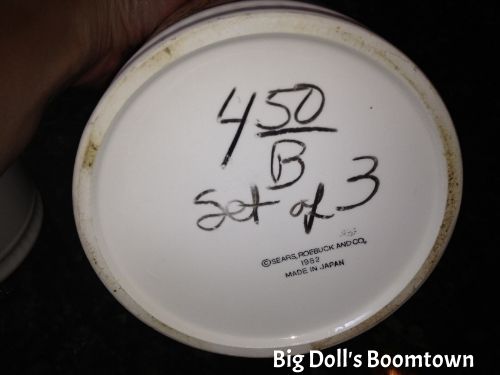
Turns out they were sold by Sears Roebuck in the early '80's.
Plenty of sets on eBay if this is your style -- I think the mushrooms are cute,
but not the look I was going for.
Since these have brown lids, I didn't even have to spray paint 'em.
Heh - score lazy points for ME.
After I scrubbed the canisters with hot, soapy water, and dried them thoroughly,
I kinda went overboard on my paint prep and taping these canisters off.
I didn't want paint inside them (to keep them food safe) or on the bottoms
(goodness forbid they should stick to a surface).
So I taped the entire bottoms of all 3 off,
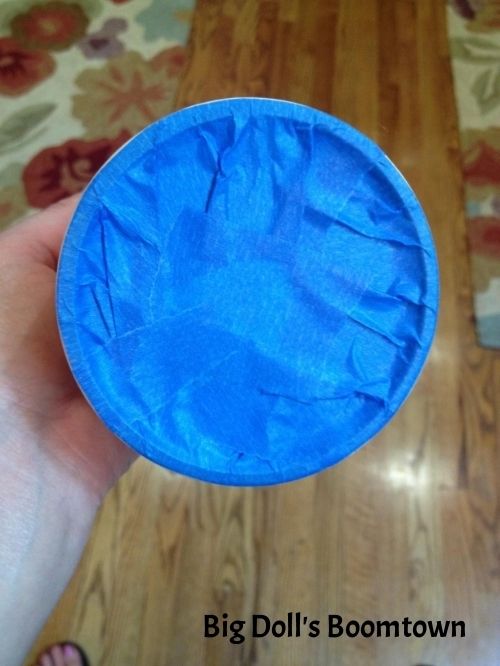
and then taped the inside edge plus taped a sandwich baggie
inside each to prevent spray paint from getting inside.
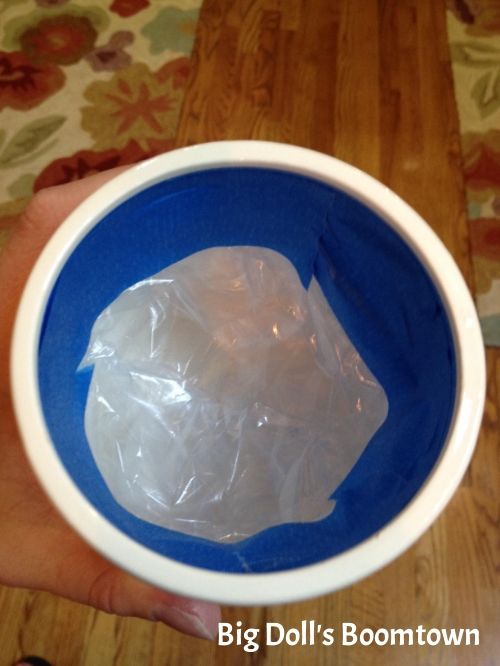

and then taped the inside edge plus taped a sandwich baggie
inside each to prevent spray paint from getting inside.

It took a while, but it was worth it.
Now, I have done a Lot of spray painting, but I made a horrible, no-good mistake
because I was SO excited to get started on these canisters.
... I spray painted on a really humid day.
Like, it had JUST stopped raining. I know, I know.
My paint did not want to dry well, and the edges stayed tacky forever.
Cannot tell you how many times I had to respray parts that I messed up
when I thought they were dry and touched them to try to move them.
I seriously felt like I had ruined the whole set.
Lesson learned: nevah-evah-evah use spray paint when it's damp outside!
But all's well that ends well, and finally I brought them inside for a little glazing.
Already looking pretty good, huh?
Anyhoo.
I will now share with you the high tech, top secret method in which I glaze things:
mix water and a little brown acrylic craft paint (not too runny),
and sponge on with a paper towel. Let dry.
Yes, that is it.
The effect is very subtle -- the brown glaze just mutes the colors a bit
so they blend better with the tones in the rug.
The effect is very subtle -- the brown glaze just mutes the colors a bit
so they blend better with the tones in the rug.
What do you think? I think I lovvvve 'em!
So cute, so easy, and so inexpensive :-)
A perfect custom match to my inspiration rugs, too!
I would love for you to become my newest follower
so you can watch my kitchen's progress!

This week I'm partying with:
Amaze Me Mondays @ Dwellings - The Heart of Your Home
Mod Mix Monday @ Mod Vintage Life
Masterpiece Monday @ Boogie Board Cottage
Mop It Up Monday @ I Should Be Mopping The Floor
Creative Bloggers' Party @ Homemaker on a Dime
What'd You Do This Weekend @ Recipes and Ramblings
Inspire Me Tuesday @ A Stroll Thru Life
The Scoop @ Cedar Hill Ranch
One Project At A Time @ A Bowl Full Of Lemons
Efforts and Assets Party @ Hickory Trail Blog
Get Your Craft On Tuesdays @ Today's Creative Blog
Terrific Tuesdays @ Adventures of a DIY Mom
Tuesday's Treasures @ My Uncommon Slice of Suburbia
Penny Pinching Party @ The Thrifty Home
Works For Me Wednesdays @ We Are That Family
What I Whipped Up Wednesdays @ Sugar and Dots
Whatever Goes Wednesdays @ Someday Crafts
Fluster's Creative Muster Link Party @ Fluster Buster
Cast Party Wednesday @ Lady Behind The Curtain
We Did It Wednesday @ Sew Much Ado
What's It Wednesdays @ Ivy and Elephants
Show and Share @ Southern Lovely
Wonderful Wednesday Blog Hop @ Ducks 'n a Row
Catch a Glimpse Party @ A Glimpse Inside
Hookin Up with HoH @ House of Hepworths
Thrifty to Nifty @ A Jennuine Life
Time Travel Thursday @ The Brambleberry Cottage
All Things Thursday Link-Up @ All Things With Purpose
Thursday's Treasures @ Chocolate Chocolate and More!
Open House Party @ No Minimalist Here
Thursday's Treasures @ Recipes For My Boys
Frugalicious Fridays @ Finding Fabulous
Craftionary link party @ Craftionary
Show and Tell Friday @ My Romantic Home
Featured Nest Friday @ French Country Cottage
Create and Share Friday @ Trendy Treehouse
Frugal Friday's @ Shabby Nest
TGIF Linky Party @ Living Better Together
Pity Party @ 30 Hand Made Days
Share Your Creativity @ It's Overflowing
From the Farm Blog Hop @ Sunny Simple Life
Party Junk @ Funky Junk Interiors




I love it, they look amazing. Great job. Hugs, Marty
ReplyDeleteThanks Marty!
ReplyDeleteThanks so much for stopping by!!
ReplyDeleteThe cannisters came out really good. I had to chuckle when I saw them because I had the ENTIRE set of all this Mushroom Kitchen stuff from Sears when I first got married in 1978!!! So that is at least how old these cannisters are!!
hugs,
Deb
Debbie, my mom had fond memories of the Merry Mushroom set, too! Too funny, and I am glad to have gotten to bring them back to life :-)
DeleteWow, I am impressed............what a great job and they came out so cute.....what a clever idea
ReplyDeleteto buy a canister set to paint, would have never thought of that myself.
Anywho, love your inspiration rugs too, and the canisters could not go with it any better.
Very nice............thanks for sharing these great ideas with us.
Blessings, Nellie
Why, thank you, Nellie!
DeleteWhat a great save! I had no idea you could paint anything ceramic! My world is gonna rock today! Just stopping by to say howdy from Assets and Efforts linky party. I'm a first time poster there so hope you stop by to visit.
ReplyDeleteYes, Jeanne, you sure can! I love my spray paint and have also sprayed ceramic lamps with great success too.
DeleteThey turned out so pretty! Would love for you to share at Simple & Sweet Fridays. New follower!
ReplyDeleteJody
What a clever idea! I have some canisters that might have to meet some spray paint. Thanks for stopping by and linking up to Fluster Buster's Creative Muster Party! Looking forward to seeing what you're going to link up next week.
ReplyDeleteRobin @ Fluster Buster
These turned out adorable - if I didn't know, I'd guess Pier One! :)
ReplyDeleteThey turned out GREAT!!! I found a set of 4 canisters at our Salv Boutique aka Salvation Army.BUT they had them priced separately totaling up to $15. NO WAY!!!! I asked if they would offer a price for the set. $12.99 REALLY????? They are used and were DONATED!!!!! I have been looking for quite sometime for a set.
ReplyDeleteI bought them.... I can't wait to paint them, but we have had rain for the last 2 weeks so I will learn from you and wait. Thanks for sharing your project. I wasn't sure what I would have to use so that the paint would stick on the slick ceramic surface.
best entry mats for hardwood floors
ReplyDeleteI love your job. However, you took highly collectible ceramics and forever changed them. You would have done better selling them as a set and using the money to buy a new cannister set and still have $$ left over. As a collector, seeing this cannister set forever changed, hurt my heart.
ReplyDeleteSame :( :( :(
Deletethanks for the information
ReplyDeleteFlickr
Weebly
Puzl
Plurk