Twitter Facebook RSS Bloglovin Pinterest Instagram Image Map

Wednesday, August 28, 2013

French Dip Sandwiches - Slow Cooker Recipe


Pin It!

This recipe is sooooooo easy and makes a ton of yummy seasoned meat,
 just in time for fall and football season!
You will love making French Dip Sandwiches at home and never order it in a sandwich shop again --
it's that good, I promise!

You will need:
  • 1 2.5-3.5 lb. chuck roast
  • 1 packet of onion soup mix (alternately, you could sub beef bouillion and extra dried minced onion)
  • 1/2 tsp. garlic powder
  • 1 1/2 tbsp. dried minced onion
  • 1/2 tsp. black pepper (no extra salt, btw, because the soup mix has plenty)
  • 1 or 2 bay leaves (mine were chopped, 'cause that's what I had on hand)
  • 1 bottle of beer, whatever you have around (I have made it w/o beer and it's good this way, too -- the beer just gives a richer taste), OR
  • A couple cups of water, depending on the size of your roast and slow cooker (do not use beer AND water, choose one or the other)
  • Nonstick spray

Spray your slow cooker with the nonstick spray. 
Put the onion soup mix, garlic powder, dried onion, pepper, and bay leaves in there, 
and pour the beer or water over it. Stir to mix.
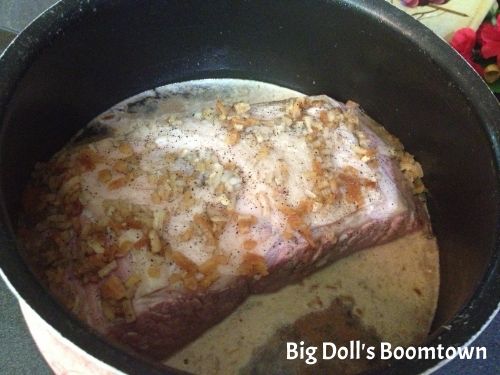
Put the roast in the mixture, and cook on 8-10 hrs. on low, flipping the roast over 
midway through if possible.


After cooking, remove the roast to cool. 
Using a wire mesh strainer, strain the au jus (which is now what you call your juicy mixture)
 to remove the onion and bay leaves. I stick it in the fridge so that any fat will solidify on the surface.
 Once your roast has cooled enough to handle, slice it and shred it. 
Pour a little au jus over the top to keep the meat moist, and especially for reheating.

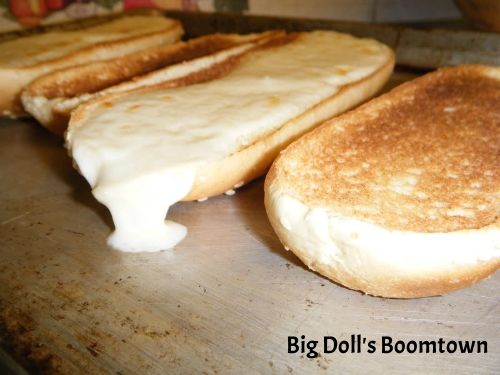
We like to toast provolone on sub buns,


pile it high with shredded beef,


and have warm au jus on the side to dip it in.
O ... M ... G. 
Your taste buds will think they've died and gone to heaven,
and you can pat yourself on the back for cooking something so yummy with so little effort!

Another delicious option is to use this meat to stuff baked potatoes!
Leftover au jus is great for making beef gravy and pot pies, too :-)
Ya just can't go wrong - get thee to a grocery and make it this week!

Monday, August 26, 2013

Vintage Rolling Pin Art

 photo 19.jpg


Pin It!
Alert! This post is VERY image heavy -- I wanted to be sure
readers could see exactly what I did, since I couldn't find
any type of project similar online. 
ENJOY!
Back in March, my sweet great-aunt gave me a beautiful vintage rolling pin.
I loved it at first sight! It's my first vintage kitchen utensil, too.
The last thing I wanted to do was let this beauty be stashed away and forgotten in a drawer, 
so I had to figure out a way to display the rolling pin in a way to do it justice.
 Voila -- this vintage rolling pin canvas art was born!
 Wanna make it with me?


You will need:
  • one precious vintage rolling pin
  • 12x24" canvas
  • 4 sheets of scrapbook paper in coordinating prints (2 the same, and the other 2 complementary)
  • matte Mod Podge
  • sponge brush
  • scissors
  • glue stick
  • ruler and/or measuring tape
  • 3/4" ribbon
  • hammer and nail (about the size of a paneling nail - not too large in diameter)
  • thin wire (stripped from twist ties, or floral wire)
  • tape (painter's, duct, or masking) 
I started with a 12x24" canvas I bought second-hand on Facebook.
It was 1 of 2 canvases in a group of 5 items I purchased for $30, so we'll call it $6. 
I spray painted over the existing design with white paint and allowed it to dry.

As you can see in the top pic, I chose a floral, a geometric,
and a solid scrapbook paper with a slight texture.
Using a sponge brush, I brushed matte Mod Podge all over the canvas, 
fitted the floral paper over the top, and allowed it to dry. 
Next, I cut the geometric print in half, and fitted the two pieces into one long strip.
This gave me a piece that was 6" x 24."
I trimmed this piece to 18" long to allow 3" of the floral print to show top and bottom.
To create the border, I used the ruler's width as a guide to measure my strips
of the red-orange paper, and used the glue stick to stick it 
just under the edge of the geometric paper rectangle.
Using the Mod Podge again, I glued it to the floral paper on the canvas.

Once it was dry, I brushed on two more coats of Mod Podge on top.


With the help of my trusty glue gun,


I glued this fun lime green ribbon (5/8" wide) with a subtle pattern all the way around the edge.
Another great Dollar Tree find!
 
A little bit of the canvas edge still shows, but not enough to bother me,
and it's not noticeable once it's hung on the wall.

Now that the canvas itself is done, it's time to attach the rolling pin.
I wanted a method that would not harm the pin
and that also would result in the pin being removable if I ever chose.
Any type of adhesive clearly was not an option.


I eyeballed the center of the canvas and laid the rolling pin on top.
Using a pencil, I marked either side of the handles, top and bottom
and drove a nail in each mark.


Next, I clipped off 4 pieces of twist tie, about 10", and stripped the plastic off
so that I was left with only the wire.


I looped the wire around the handle in the front, through the holes,
and twisted it together snugly in the back.


Just in case, I also taped down the wire ends.

TA-DA! All done!
Seems like a lot of work, but it really wasn't that bad ;-)I spaced my project out and Mod Podged one day,
and hot glued the ribbon and attached the rolling pin on the next day.

I hope you enjoyed this Vintage Rolling Pin Art tutorial
and that it inspires you to think of
new ways to display old kitchen utensils
and any other 3-D objects you find beautiful!

This week I'm partying with:

Met Monday @ Between Naps on the Porch
Amaze Me Mondays @ Dwellings - The Heart of Your Home
Make It Pretty Monday @ The Dedicated House
 Mod Mix Monday @ Mod Vintage Life
Inspiration Monday @ twelveOeight
Masterpiece Monday @ Boogie Board Cottage
Creative Bloggers' Party @ Homemaker on a Dime 
What'd You Do This Weekend @ Recipes and Ramblings

Thursday, August 1, 2013

Whole Wheat Blueberry Pancakes

 photo bb2f1b80-f110-420e-bd09-0364964ac569.jpg

Pin It!

Delicious, healthy, and freezer friendly! Wife tested, husband approved ;-)

You will need:

1 1/4 c. whole wheat flour
2 tsp. baking powder
1 egg
1 cup milk
1/2 tsp. salt
1/2 tsp. vanilla flavoring
2 tbsp. sugar
1/2 c. blueberries (I used frozen -- no need to thaw.)

Preheat an electric griddle to 325, or have a skillet ready and
sprayed with nonstick spray to cook on medium heat.
Stir together the flour, baking powder, and salt, breaking up any lumps.
In a smaller bowl, beat together the egg, milk, vanilla flavoring, and sugar.
Stir these two mixtures together, reserving the blueberries for now.

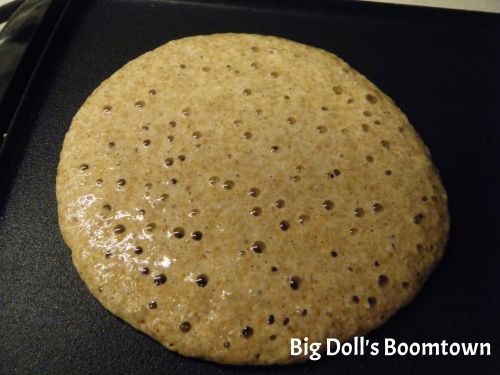
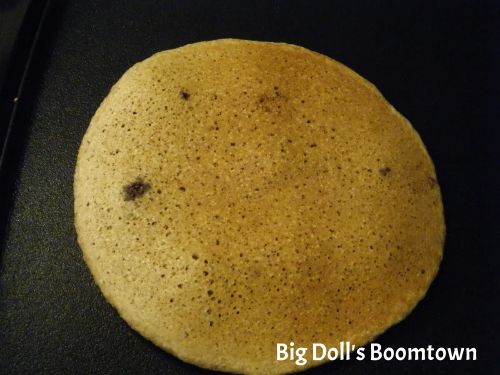
Using a ladle or small measuring cup, pour batter in about a 4-5" circle onto your griddle or skillet. When you see bubbles begin to form throughout and your edges look dry, like this ...

 photo 86364b39-04c2-44aa-8a9e-44bd1aaf576a.jpg

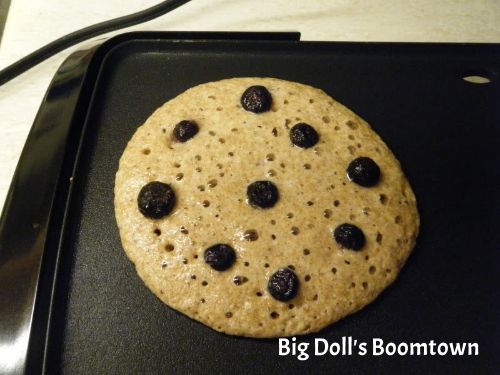
... then it's time to add blueberries evenly spaced throughout the pancake and then flip one over.
 photo 5a44a981-1376-4f96-9684-d5b320bfd7a3.jpg

I do mine this way because the berries' juice can otherwise turn your batter gray, and if they clump together, your batter will stay raw in that spot. Also, using my method, you get a blueberry in every bite! 
 (The delightfully purple fingertips you will have are another bonus ... lol)
When I start to see spots of juice appear on the cooked side of the pancake, like this ...

 photo 4ef8650a-b3b3-450c-9922-a42a82fd6e44.jpg

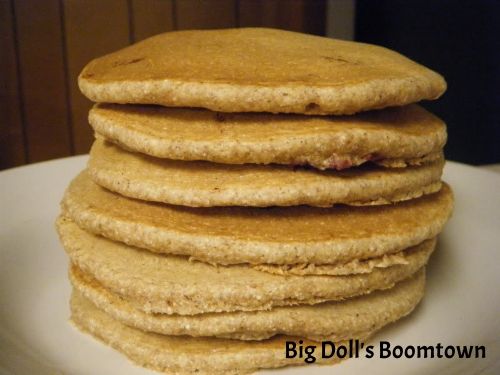
... then I remove it to a plate and begin stacking them, always with a bit of butter in between.

 photo bf65d550-5dde-49c0-84f9-60f4692241b5.jpg


Mmm. 
These have a great texture from the whole wheat flour
(still fluffy, but a bit denser).
 I love eating these with a little agave nectar!
Plain whole wheat pancakes are really good
with peanut butter and a little strawberry Polaner All-Fruit, too :-)

I do believe next time I will make these w/ banana nut!

Do you have a favorite pancake recipe?
What about tips for making breakfast healthier? 
I would love to hear about it!

This yummy post is linked to these fun parties:


Met Monday @ Between Naps on the Porch
Amaze Me Mondays @ Dwellings - The Heart of Your Home
Mod Mix Monday @ Mod Vintage Life
Masterpiece Monday @ Boogie Board Cottage
Make It Pretty Monday @ The Dedicated House
Inspiration Monday @ twelveOeight
Creative Bloggers' Party @ Homemaker on a Dime 
What'd You Do This Weekend @ Recipes and Ramblings 
Mop It Up Monday @ I Should Be Mopping The Floor  
Inspire Me Tuesday @ A Stroll Thru Life
The Scoop @ Cedar Hill Ranch
One Project At A Time @ A Bowl Full Of Lemons
Terrific Tuesdays @ Adventures of a DIY Mom
 Tuesday's Treasures @ My Uncommon Slice of Suburbia
Thursday's Treasures @ Chocolate Chocolate and More! 
Catch a Glimpse Party @ A Glimpse Inside
Thrifty to Nifty @ A Jennuine Life
Time Travel Thursday @ The Brambleberry Cottage
All Things Thursday Link-Up @ All Things With Purpose
Open House Party @ No Minimalist Here
Thursday's Treasures @ Chocolate Chocolate and More! 
Thursday's Treasures @ Recipes For My Boys
Hookin Up with HoH @ House of Hepworths