Twitter Facebook RSS Bloglovin Pinterest Instagram Image Map

Wednesday, April 24, 2013

Beach Bathroom Decor - Seashell Shadowbox

**UPDATE!!** My Seashell Shadowbox was featured on the 149th Hookin Up with HoH Party!

THANK YOU, Allison -- you rock my socks!  

And now back to our regularly scheduled programming ...

 photo frame8.jpg

Hey everyone! I made some artwork for our beach themed master bath a while back and wanted to share my how-to tips. "Beach themed? But Melody, you live in a land-locked state ..." I know, I know, but I love the ocean and earth tones combined with shades of blue, and the results (while a work in progress) make me happy when I am in there. This is a really versatile project and could be customized beyond my beach theme and placed in any room of the house to complement your own color scheme. Let's get going!

 photo frame1.jpg

I started with this $3 frame bought from my neighbor's garage sale -- great deal, plus it's Pottery Barn! I cleaned it up well, removed the back, and took out the glass and set it aside. The mat, with its 3 openings, was what really drew me to this frame. For some reason, they made me think, "Melody! Would this not be SO COOL if you made it a shadowbox?!" I had seen framed seashells before, and had a nifty little collection of my own that DH and I bought on vacation in Hilton Head, SC, that I could raid for this project. I know it's not a true shadowbox, but I knew it could be really pretty and unique all the same.

 photo frame2.jpg

I knew I needed something as a backer to both accent my shells and pick up the color scheme in my valance and bathmats. Scrapbook paper is cheap, and I have plenty of it, so that was an easy decision. I know some people have trouble selecting colors, so let me show you how I did mine. I picked three shades of blue that I felt were strong contenders, based on the colors I already have in the room, and I just held them up 'til one stood out to me more than the others.

Like this:

 photo frame3.jpg  
Comparing to the valance ...

 photo frame4.jpg
 ... annnnd, comparing to my bathmat.

I could see pretty quickly that the blue-green was my best option -- the far left color was too dark, and the center color didn't pick up the aqua tones -- so I folded the 12x12" sheet of paper in half, and cut it with scissors along the crease line. I just eyeballed the size I'd need for each opening, cut it roughly into thirds, and hot glued each one in place from the back.

 photo frame5.jpg
You could totally use tape also, especially if you wanted to reuse the mat at a later time.

From this point, I had to decide whether I wanted this frame to be oriented horizontally or vertically. I laid the shells on each paper section first while it lay horizontally ...

 photo frame6.jpg

 photo frame7.jpg

... and then rearranged them when I flipped it vertically. Either way would've been great, but the horizontal version looked the best to me. When I arranged my shells, I chose 3 that were about the same size, but different shapes. Since the pencil starfish and sand dollar were both completely white, I used them to "sandwich" the striped shell in the middle and sort of make a pattern - light, dark, light. That sort of arrangement tends to be interesting to the eye and keeps the design balanced. After I was satisfied with my arrangement, I applied a few globs of hot glue to the back of each shell and eyeballed the placement in about the middle of each square. And that's IT!

 photo a53d9009-48e6-4300-befd-b5c880ee76dd.jpg

Doesn't it look awesome in my potty nook? I wish I could claim to have made the beautiful grass and shell wreath above the Seashell Shadowbox, but this was a souvenir purchased at The Shell Shop, also in Hilton Head, SC. I'd wanted to make one, and had a plan to hand-pick each shell I'd use and blah-blah-blah (you have to imagine the "blah-blah-blah" being said in my DH's voice), but the larger, prettier shells were $6-$8 each, not counting what I'd spend for the wreath base, filler, etc, and I saw quickly that just buying the wreath pre-made was a better bet! I think it cost about $28, and I love it.

What do you think of my seashell shadowbox? Could you see yourself making something like it?

Pin It!

This post linked to:
Inspire Me Tuesday @ A Stroll Thru Life
Works For Me Wednesdays @ We Are That Family
Penny Pinching Party @ The Thrifty Home
Catch a Glimpse Party @ A Glimpse Inside
Hookin Up with HoH @ House of Hepworths
Doggone Dirty Craftin Linky Party @ Rhinestone Beagle
Catch a Glimpse Party @ A Glimpse Inside
Thursday's Treasures @ Chocolate Chocolate and More! 
Thursday's Treasures @ Recipes For My Boys

Thursday, October 4, 2012

Glade Expressions (R) Collection


I want to tell you all about a new home fragrance collection that DH and I have been enjoying, courtesy of my participation as a BzzAgent for the Glade Expressions(R) Collection. The Glade Expressions® Collection is inspired by art and designed to be left out on display. Hel-LO, this means I no longer have to scramble to hide those hideous metal cans of aerosol air freshener whenever unexpected company pops by! These authentic, easy-to-use home fragrance products release scents that open up note by note, filling your home with lightly layered fragrances and inviting life in.

The breakthrough line includes two unique, refillable products:

Glade Expressions® Fragrance Mist comes in a chic holder that blends with your décor for a burst of fragrance that's always out and available. Simply squeeze to release a long-lasting, light mist of fragrance; then refill the holder with your favorite true-to-life scent.

DH and I are totally loving the Cotton and Italian Mandarin fragrance mist -- it's a scent like fresh laundry with a subtle citrus twist, and it just resonates clean, calm, and cozy. Although I gotta say, as much as I love this scent, I can't wait to refill the sleek white holder with another one! What can I say ... I love options, and I love yummy smells :-) Unlike many aerosol room sprays I've tried, these scents don't have an overbearing, fake aroma that becomes cloying. Let me tell you, we have pets, and honey, I've tried every spray you could imagine. This Glade Expressions mist is light, but lasting and effective.

The Glade Expressions® Oil Diffuser releases authentic and exotic fragrances without having to plug it in or find batteries. The trendy holder matches décor perfectly - and is also refillable - making it an effective, stylish option for layering true-to-life fragrances in all of your living spaces.

They had me when they said "no batteries." Easy peasy, lemon squeezy! I chose the Pineapple Mangosteen fragrance and was intrigued by the design of the bamboo diffuser with graceful leaves carved in the wood. What a pretty and unique accent to my decor, and I love that it's doing double duty by releasing an authentic fresh-fruit smell to make our family room welcoming.

Wanna know more about the Glade Expressions(R) fragrance options? Uh, of course you do! Here's whatcha got:

Cotton & Italian Mandarin - Open your home with the bright, breezy blend of cotton and sparkling citrus, honeydew and sandalwood (mist only)

Fuji Apple & Cardamom Spice - A ripe, spicy blend of sweet pears and crisp apple with a dash of cinnamon and clove that warms and invigorates

Lavender & Juniper Berry - Lush lavender blends with fresh juniper berry, eucalyptus and rose to relax the senses and open your home

Pineapple & Mangosteen - Evoke a tropical paradise with the blend of freshly cut pineapples and hint of tangy mangosteen, creamy coconut and passionflower

I can't wait to try the Fuji Apple and Cardamom Spice for the holidays, and Lavender and Juniper Berry sounds perfect for a guest bedroom or even our master bath. Go check these out, folks -- you know you have a space in need of a fabulous new fragrance, and these are just right!

Full Disclosure: I'm a BzzAgent and I received Glade Expressions(R) Collection coupons from BzzAgent.com that enabled me to experience the mist and oil diffusers.

Sunday, September 18, 2011

Goodwill Quickie Redo!

Photobucket

No "before" pic -- sorry, y'all! I found this cute chicken wire basket with a red gingham liner at my Goodwill for $2. The "Breads" plaques on either side were smudged and dirty, and I wanted to repurpose it for storage in the office/craft room. What to do?

Photobucket

First, I looked closely at the basket to figure out how the plaques were attached. They seemed to be wired on through tiny holes drilled at top center and bottom of each circle.

They were easily removed, and I pulled out my trusty fleur de lis stamp and Stayz On permanent ink 
to add a new design to the blank back sides of the plaques. 

I really like clear acrylic stamps for when placement is key -- makes it soooo much easier to line things up. Got both the ink pad and the stamp at Michaels. Magnifique!

Now for reattaching the plaques :-) The existing wire was too brittle and broke as I removed it, so to replace it without spending money, I stripped the paper off some bread bag ties and used that wire -- perfect fit! This is one of my favorite frugal tips for crafting -- just soak a paper bread bag tie in water and then use your fingernails to scrape the wet paper off. The resulting wire is helpful for a lot of things: small jewelry repairs, adding ornaments or small decorative items to Christmas garland, etc.

This little project gave me a finished product in less than 15 minutes and the basket looks great sitting on the bookshelves in the office/craft room holding blank CDs, staples, etc. Cute AND easy -- I like it!


Pin It!

Monday, September 5, 2011

Mega-Cooking Made Easy!

Hey guys!

I love the idea of once-a-month-cooking (OAMC), but I'd rather have flexibility by pre-cooking key ingredients only instead of entire casseroles. 
Also, we don't have the freezer space for casserole dishes, but I can fit a lot in by freezing it flat in bags. Major time saver for cooking after work or getting a meal ready on the night I have class.

Let's look at what I've made to freeze today!

Photobucket

- 4 bags of seasoned browned ground venison, 1.5 c. each
- 2 bags of seasoned cooked chicken breast chunks, 1.5 c. each
- 24 assorted muffins jazzed up from mixes: oatmeal-raisin w/ cinnamon and walnuts; blueberry w/ real berries added; and raspberry with pear and ginger
- 2 bags of fluffy white rice, 2 c. each (I add salsa, chili powder, garlic powder, and a little chicken bouillon when I want Spanish rice)
- 1-2 c. batch of alfredo sauce

Other things I'm thinking of freezing?

- diced smoked sausage
- pizza dough from my breadmaker
- cooked pinto beans (I can get 3-2 c. portions from one bag of dried beans and actually have one bag of cooked beans already lurking in the freezer from a couple of weeks ago)
- chopped green bell pepper

With these frozen ingredients and some pantry staples, you can cook up A Lot of different things.

Pantry staples:

- diced tomatoes (regular and ro-tel -- I just add garlic and Italian seasoning to plain ones for Italian)
- other types of beans: black, kidney, chili, white (canned or dry)
- 15-bean soup blend
- "cream of" soups
- pasta: spaghetti, rotini, penne, bowtie, egg noodles
- tuna
- spaghetti sauce (can blend with a little tomato paste for pizza sauce in a pinch)
- shredded cheese (not in the pantry, in the fridge :fff: )
- eggs (ditto)
- tortillas

Examples of things that I can cook w/ these items:

- spaghetti
- tater tot casserole
- taco soup
- chicken tortilla soup
- country bean soup w/ sausage
- tuna noodle casserole
- chicken and rice casserole
- chicken alfredo
- red beans and rice
- nachos
- quesadillas (w/ rice and beans!)
- enchiladas
- bean burritos
- pizza: white pizza, hamburger, veggie ...
- quiche

There's of course many more options, 
especially based on your family's likes or special food needs, but you get the picture! 
Have you ever precooked and frozen meals or components of meals? Do tell!


Pin It!

Sunday, January 30, 2011

A Big Hello After A Big Absence!

Hi folks! Remember me? 
That person who used to sporadically blog a craft project or recipe, 
and then dropped off the face of the earth? 
Yeah, me! 
Well, I'm back and hopefully in a big way. 
But what, may you ask, kept me busy for so long?

Well, I got a Yorkie puppy, Skeeter (insert "awwwww!" here).

Photobucket


Taking care of this little boogie-tail has definitely been a focus of my spare time, 
and we love to play and hang out together. 
She's my bestest buddy and really keeps me great company 
when DH works late or is out of town.

Also, between Thanksgiving and Christmas, 
we had porcelain tile laid in our kitchen and laundry room, 
and laminate installed in our den and office areas.

Sneak peek at the flooring we used (but this is all you get for now!):
Photobucket

and
Photobucket


Not sure if I'd recommend this particular time of year for home reno, 
but it worked for us because we've yet to host a family get-together around the holidays 
and thus we didn't have a specific deadline for getting the work and cleanup accomplished. 

The new flooring surfaces have made a big difference in our home, 
and for the first time, my DH seemed a little excited about a home project! 
(WELL worth the money spent, if you ask me.)

I made several Christmas gifts from scratch for family members, 
and that took up most of December. 
Besides the edible gifts of candy and quick breads, 
I also made a set of 5 effusion (or catalytic) lamp scents 
for my mother and grandmother, 
and you can read how I did this in my
 "Scents of Autumn On A Budget" post.

One of my goals for the year is to blog more consistently about recipes I try,
 projects I complete, and even just the ideas I have, 
in an effort to stimulate myself and others in a creative vein. 
Too often we find ourselves wrapped up in the "have-to's" 
and forego the "want-to's" entirely. However, life needs a little sprinkle of "want-to" 
to keep things happy and leave us feeling fulfilled in all areas! 

Let's see what 2011 brings for Big Doll's Boomtown, 
and I hope you'll join me along for the ride :-)

Friday, November 26, 2010

Card-Making Fun @ Shutterfly!

I love how accessible photography has become for people now that digital cameras have become the norm! Even complex editing processes have become more user-friendly, thanks to online tutorials. Personally, I enjoy digital scrapbooking, emailing pics to family, and creating fun photo projects both for my home and for gifts.

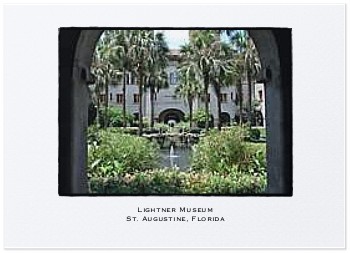
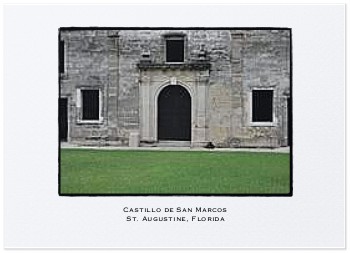
My favorite photo share site is www.shutterfly.com. I've uploaded wedding, honeymoon, vacation, and everyday shots to this site, and I can truly say they make projects a breeze. For example, check out these all-occasion cards I made using my talented husband's gorgeous photography from our 2009 vacation to St. Augustine, FL:

Rough Edge 5x7 folded card
Unique party invitations and greeting cards by Shutterfly.
View the entire collection of cards.

The courtyard of the Lightner Museum is exotic, and easily as beautiful as any of the treasures inside.

Rough Edge 5x7 folded card
Unique party invitations and greeting cards by Shutterfly.
View the entire collection of cards.

We loved the peaceful, spiritual Nombre de Dios Mission and were in awe of this beautiful cross and the lovely landscaping at this historic location.

Rough Edge 5x7 folded card
Unique party invitations and greeting cards by Shutterfly.
View the entire collection of cards.

Castillo de San Marcos is an intimidating 16th century Spanish fort with plenty of architectural detail like this arched doorway and stonework.

These cards are only one example of many gorgeous, easy-to-use templates that Shutterfly offers to turn your pictures into meaningful greetings for any event. Imagine what you could make with family snapshots just in time for Christmas!

Sunday, September 19, 2010

Scents of Autumn -- On a Budget!

I'm noticing a trend that I love to see -- more and more of my fellow bloggers are longing for FALL! Some of this autumn action is taking place here in my corner of Boomtown, too! I've got my fall wreath on the door, my pumpkin doormat ready for visitors, and a cute flag on my porch to round it out. I can't want to buy pumpkins and set up an outdoors vignette with some mums and a cute scarecrow family!

One aspect of fall decorating that we shouldn't forget, however, is the lovely aromas associated with this time of year. Apple cider, pumpkin bread, warm vanilla from sugar cookies, the crisp, earthy scent of colorful leaves -- all of these things can also be represented in our "scent decor," too.

Photobucket

Your options are vast: candles, room sprays, plug-in scent distributors, potupurri, tart warmers, and so on. My personal favorite, however, is the oil effusion lamp. Some of you know these as "Lampe Bergers," which is a trademarked name of one type of these lamps. I received my first, this purple beauty here (a Lampe Avenue lamp) as a wedding gift along with a bottle of La-Tee-Da fragrance.

Photobucket

At first, I was clueless and a little scared to use it, but I did a little searching and found several videos on YouTube that taught me all about it. My first time using it -- WOW. I could not believe how quickly and thoroughly my house was filled with the delicious aroma of spicy orange, and I was completely in love! I learned that effusion lamps also purify the air, instead of just covering odors up, and this was a huge bonus for me because I want the air quality in my home to be as clean as possible.

However, the day soon came that I ran out of fragrance. I trotted down to buy a new bottle, and was shocked to learn that my new love was $12 a pop at my local Hallmark store!

uh oh Pictures, Images and Photos

I felt sad that I might be limited to only using my effusion lamp for short periods of time or on special occasions, but then I snapped out of it and hit up the search engines in hot pursuit of a budget friendly alternative.

Here's where Christy's Thrifty Decorating, a blog I love, saved my skin! Christy did several posts on using effusion lamps and even cracked the code on how to make your own fragrance. Here's her recipe:

16 fl. oz. isopropyl alcohol, 91% (I buy mine @ Walgreen's and Wal-Mart)
0.5 oz. of essential oil (about 1/2 of a 1 fl. oz. bottle)
0.5 oz. of distilled water

Mix right in the rubbing alcohol bottle and use as you would store-bought fragrance. I label mine with a Sharpie and keep them under the cabinet along with my tiny funnels. Do not fill your effusion lamp more than halfway, because it will not burn properly.

** Please note: I am not taking credit for this recipe! All praise should go to Christy :-) Please check her blog out, because she does some amazing things on a dime with Mod Podge and Goodwill finds!

I make my fragrance without the distilled water, because I generally cannot fit it into the rubbing alcohol bottle. I bet some of you might be wondering where the essential oil is purchased. Christy suggested Bramble Berry, and I can confidently recommend them through my own personal experience also. I buy the scents listed under "Fragrance Oils" on their website. But what, you ask, is the difference in price between making your own and buying it? I'm so glad you asked!

16 oz. 91% isopropyl alcohol -- $1.56 @ my Wal-Mart
1 oz. fragrance oil from Brambleberry -- scents range from $2 - $4
Shipping -- $8.50 (FedEx)

But don't forget that you only use half of a 1 oz. bottle of fragrance oil per bottle of 91% rubbing alcohol! I order 8-10 fragrance oils at a time (because I love me some variety!), so my shipping averages out to be about 0.85 to $1.06 per fragrance. Assuming you order 10 oils, with each oil costing you about $3 average, the grand total for each bottle of prepared fragrance is ... $3.91. MUCH better than $12 a pop! Can I get a WOOT WOOT?!

Fragrances I love for fall include Arabian Spice, Applejack Peel, Kumquat, and Vanilla Vanilla.

Photobucket

I'll soon be trying some new ones, like Amber, Buttercream & Snickerdoodle, Pumpkin Pie, and Wassail!

So tell me, visitors -- how do you like to scent your homes for fall, and what methods do you use to get the yummy fragrances in the air?